

Organising and preparing the workshop
6 simple steps from now until you are ready to host a workshop
How It Works
“One of the marvellous things about community is that it enables us to welcome and help people in a way we couldn't as individuals.” – Jean Vanier
1Organising the workshop
We have make this stage as hassle free as possible because life is complicated enough already.
2Preparing for the workshop
There are 3 simple tasks to complete to get everything ready.
3Running the workshop
The Workshop Playbook contains everything that you need to guide you through running the workshop on the day.
1. Organising the workshop
“Alone, we can do so little; together, we can do so much”
Helen KellerStep 1 - Identify your community
This might be obvious; for example if you are already part of a community group in the area where you live. Or, it might be less place-based and instead centred on something you do regularly (for example; playing football, attending events at your child's school or connected to your work).
The key thing to think about is how to describe the community to the people you invite, so they can clearly understand why they are part of it.
Step 2 - Find a place to meet
The workshop has been designed so that it can be held almost anywhere. Ideally, you will need some tables and chairs so that people can easily write things down. It will also work best if there is room for the group to break into smaller sub-groups (around 4-5 people) for some of the workshop exercises. We would also encourage you to make sure food and drinks are available to help people feel relaxed and looked after.
Step 3 - Invite people to attend
We have created a ready made invitation for you to send out. You just need to add the details in the template below (the name of your community and the workshop details)
2. Preparing for the workshop
There are 3 pre-workshop tasks that we ask the facilitator to prepare
Step 4 - Send out a pre-workshop questionnaire
We have created a short online questionnaire for people to use.
If you have any participants who would prefer a printed version then you can download a printable version by clicking here.
Please let the Central Team know that you are expecting questionnaire responses and the name of your community. They will monitor the response email and forward the collated responses for your community to you before the workshop date.

Step 5 - Create a Response Quadrant for Workshop 1
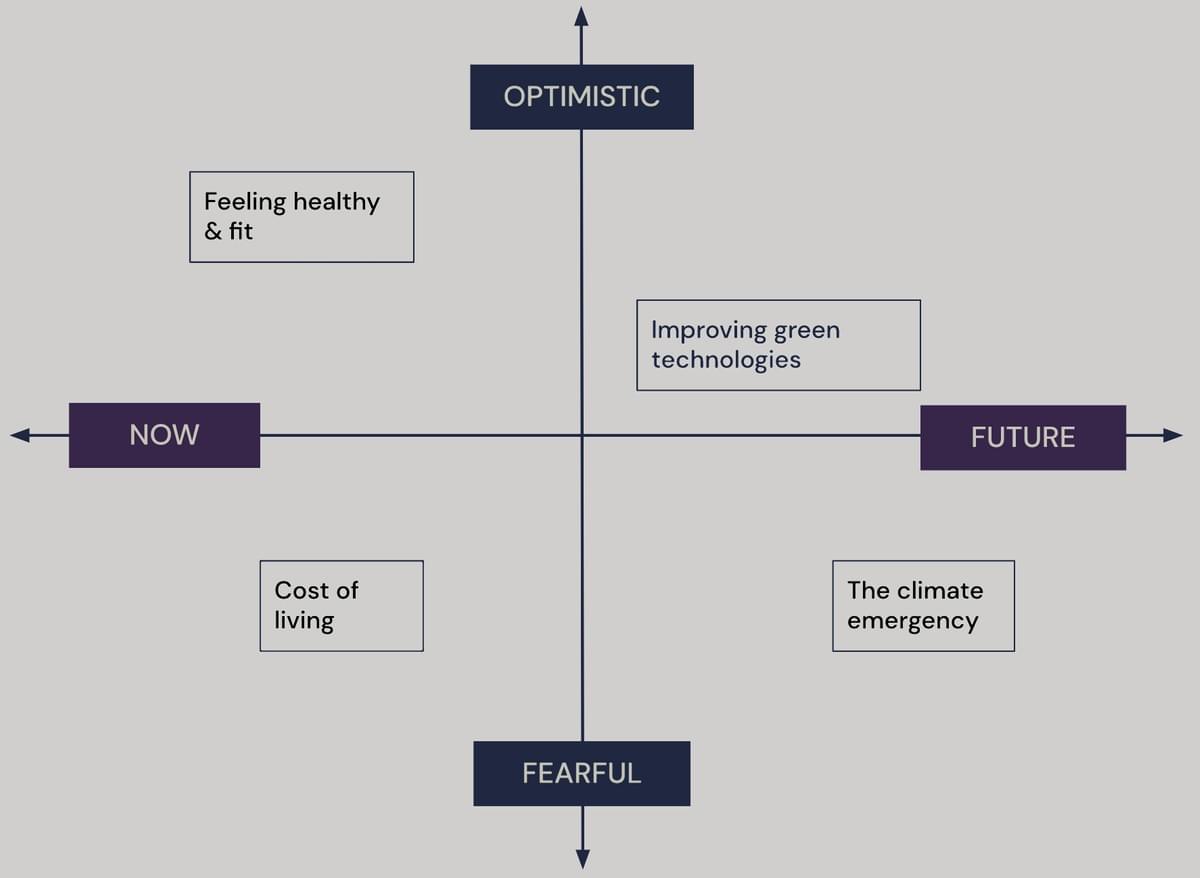
We have designed a simple quadrant to be used in the first workshop. This will help to frame the exercises and capture the key outcomes. This is designed to be very low tech! You can use pieces of string, beer mats, or a large piece of paper to create the 4 quadrants. The axis labels (Now, Future, Optimistic, Fearful) can be simply written on pieces of paper. We would suggest adding a few examples (ideally using the questionnaire responses - see step 6) before the workshop begins.

Step 5a - Create a Scenario Board for Workshop 2 (optional)
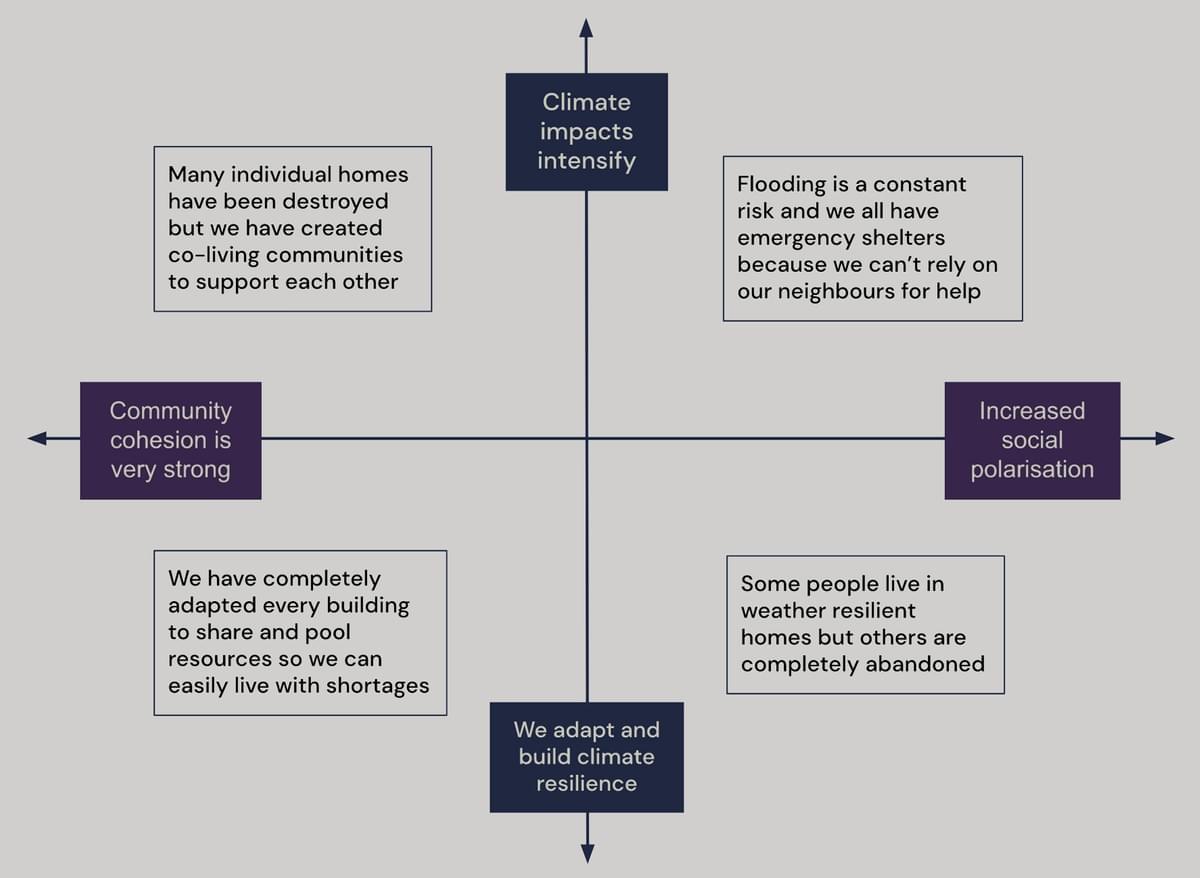
Workshop 2 is an optional add-on if you would like to run a second workshop. Again, this is designed to be very low tech. The exercises will work best if you add some examples (ideally using the outputs from Workshop 1) before the workshop begins.
Step 6 - Review the questionnaire responses to identify key themes
It is important that participants feel their views and opinions are central to the workshop. We therefore suggest that you use the questionnaire responses to pull out some examples to use in the first workshop exercise. We will forward any online responses to you as soon as we receive them.
3. Using the Playbook to run the workshop
Explore the online Playbook
©Dark Matter Labs 2023


